Welcome to my Homelab! As an I.T. Security Engineer and tech enthusiast, I believe in continuous learning through hands-on experience. My homelab is a powerful testing ground where I explore enterprise-grade tools, network configurations, and cybersecurity techniques—all from the comfort of my home.
Why I Built My Homelab
Skill Enhancement: Practice enterprise tools in a controlled environment
Experimentation: Learn by deploying, breaking, and rebuilding
Security Focus: Real-world experience with VLANs, firewalls, and SIEM
Career Growth: Stay current in cybersecurity and system administration
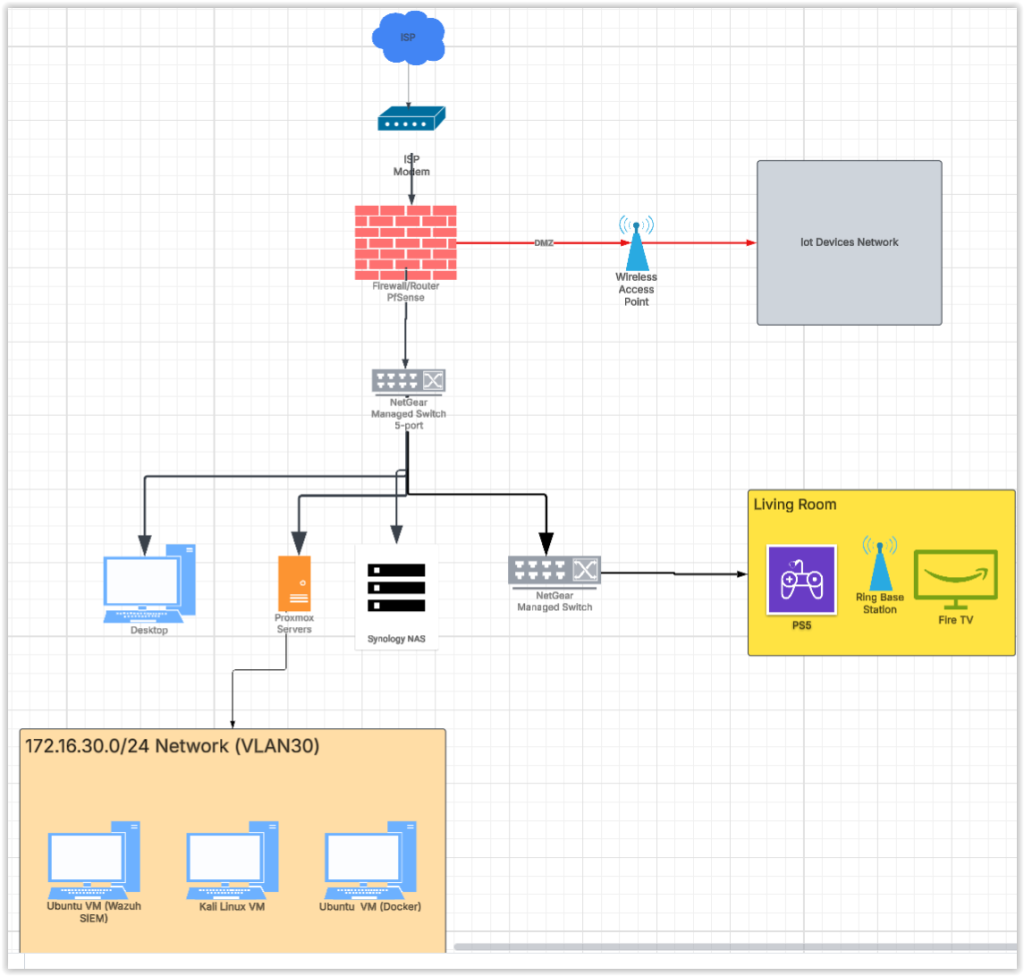
Infrastructure Overview
My homelab is built on the foundation of Proxmox virtualization, pfSense firewall, and a range of Linux-based services running across virtual machines and Docker containers.
Firewall & Network Segmentation
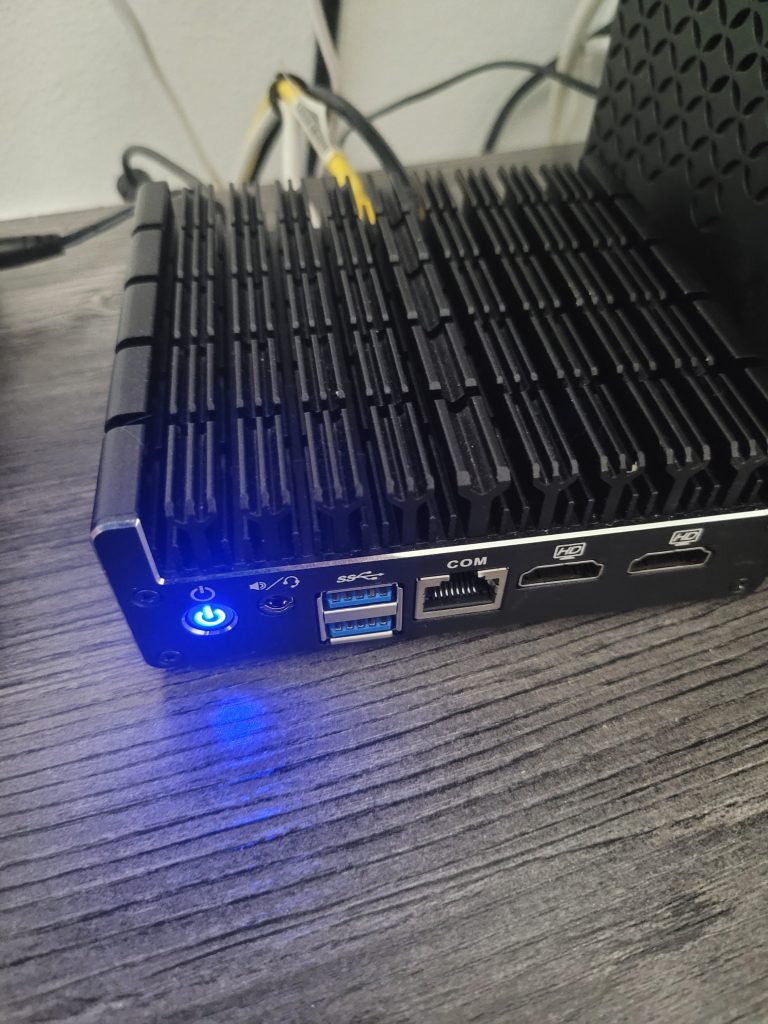
One of the first step I took in my Homelab Jounery was replacing my Home Router which was a alo store bought I bought back in 2018. After doing some research I can across the PfSense firewall/router and after watching a few Youtube video I decide to make the switch.
Replaced Netgear router with a fanless mini-PC running pfSense
Configured multiple VLANs to isolate IoT from LAN traffic
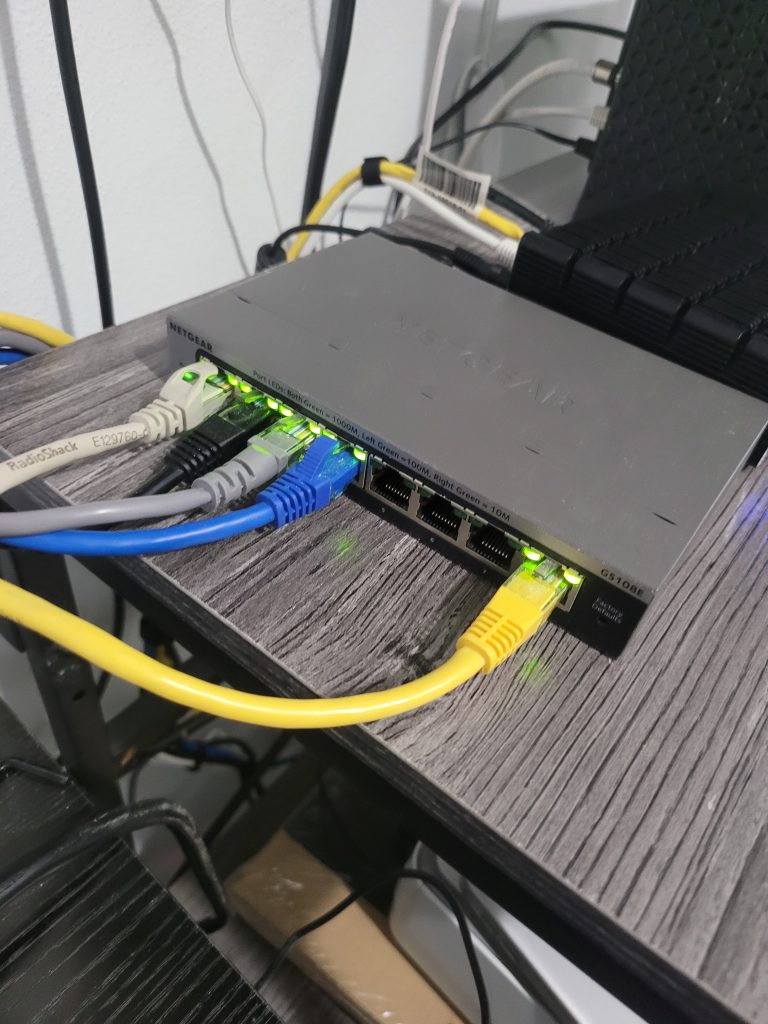
Integrated Netgear managed switches with VLAN tagging
Protectli Vault FW4B - 4 Port, Firewall Micro Appliance/Mini PC
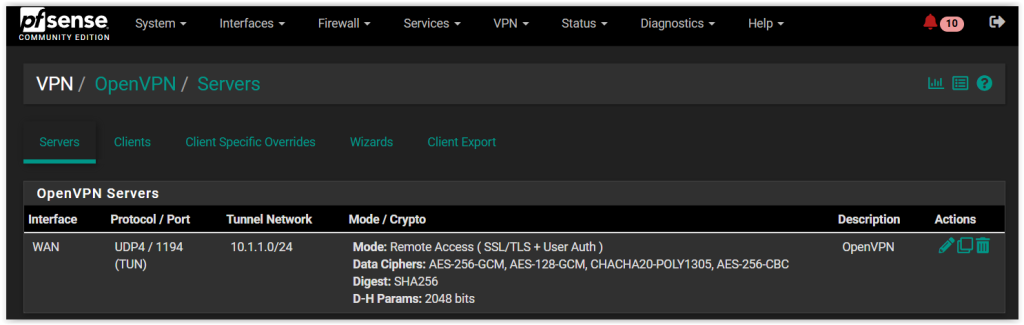
OpenVPN is an open-source virtual private network (VPN) solution that creates a secure, encrypted tunnel between your device and a private network—like your homelab.
In my setup, I configured OpenVPN on pfSense, my firewall and router, to allow remote access to my home network. This means I can securely connect to all my internal services from anywhere in the world using my laptop or smartphone.
How it works:
pfSense acts as the OpenVPN server, listening for secure connections.
My devices (client-side) use an OpenVPN profile to connect to the server.
Once connected, the device becomes part of my home network, gaining access to internal IPs and services (e.g., dashboards, VMs, or Docker apps).
This setup enhances both security and convenience, ensuring I can manage and monitor my homelab even while I’m away.
OpenVPN in PfSense
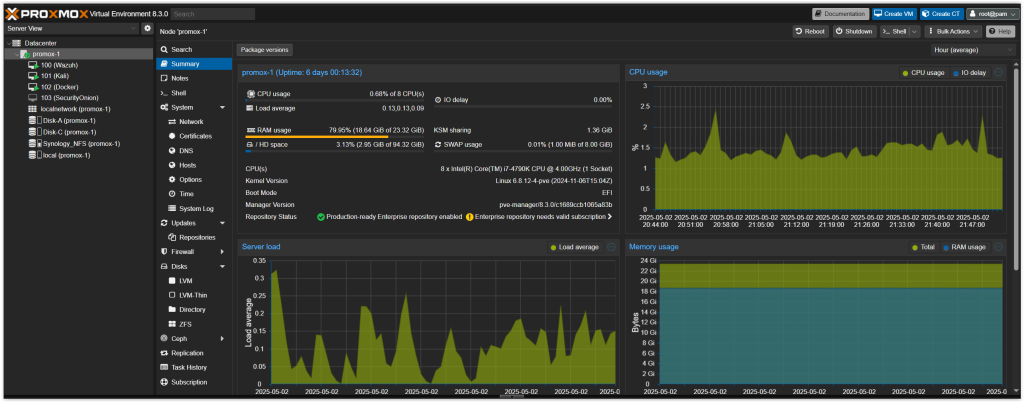
Virtualization with Proxmox
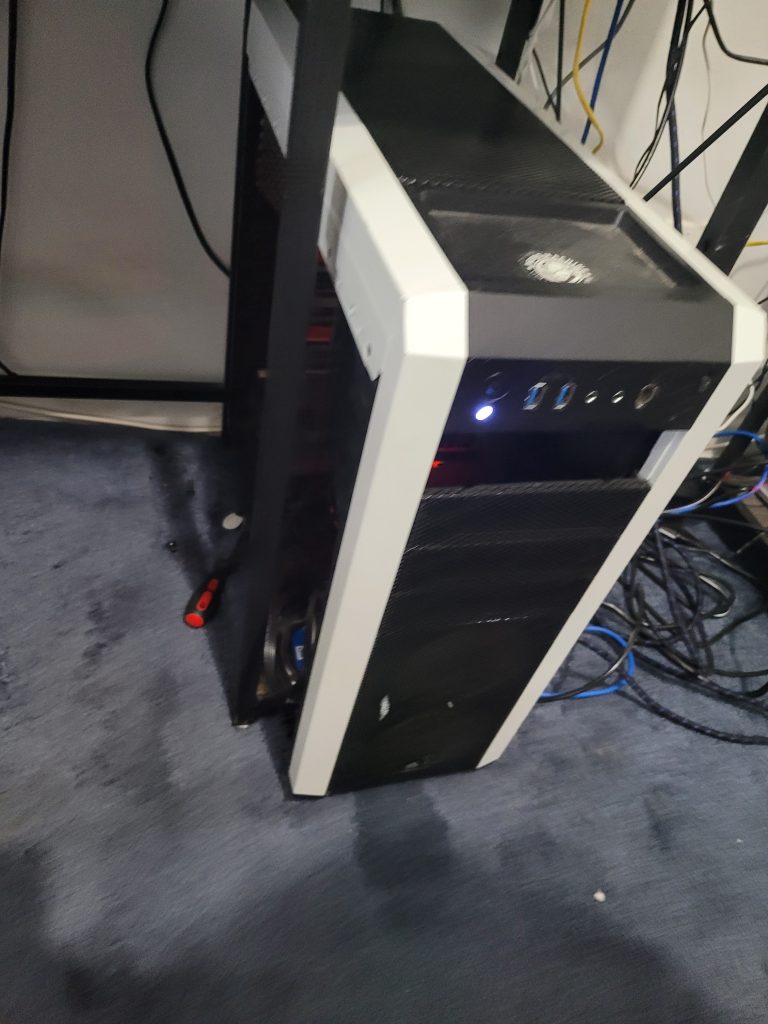
The best thing about homelab is you don’t need to buy expense hardware and software to start your homelab journey. I re-purpose my old gaming desktop as a server that I install Proxmox on.
Here is a list of my current VM that I run in Proxmox and the Virtual Machines I have running:
Wazuh SIEM (Ubuntu 22.04): Logs forwarded from pfSense, visualized with Grafana
Pi-hole DNS (Ubuntu 24.04 LTS): Network-wide ad/tracker blocking
Proxmox is an open-source virtualization platform that lets you run and manage virtual machines (VMs) and containers from a web-based interface. In my homelab, I use Proxmox to repurpose an old PC into a powerful hypervisor.
With Proxmox, I’ve created multiple VMs to host key services like:
My Wazuh SIEM server
A Pi-hole DNS server
A Docker host for running self-hosted applications
This setup gives me flexibility to isolate services, manage resources efficiently, and simulate enterprise-grade environments right at home.
Dockerized Applications
One of the best aspect fo getting into homelab is playing around with docker/containers:
Here is a liset of my current dockers that I run in my homelab:
Portainer
Nginx Proxy Manager
IT-Tools
Paperless-ngx
Mealie
Immich
Speedtest
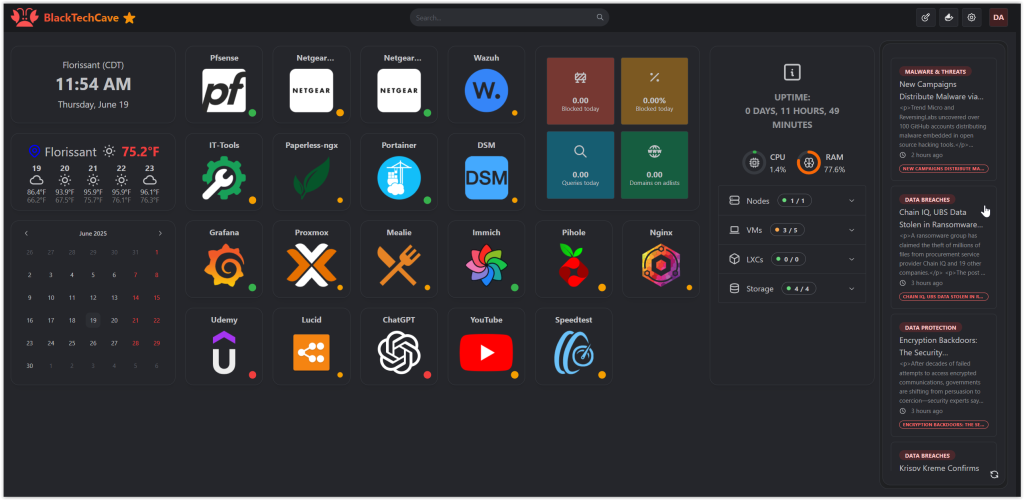
Homarr (Homelab hub dashboard)
Homarr is one of my favorites dockers as it allow me to create a dashboard to mange and access my homelab.
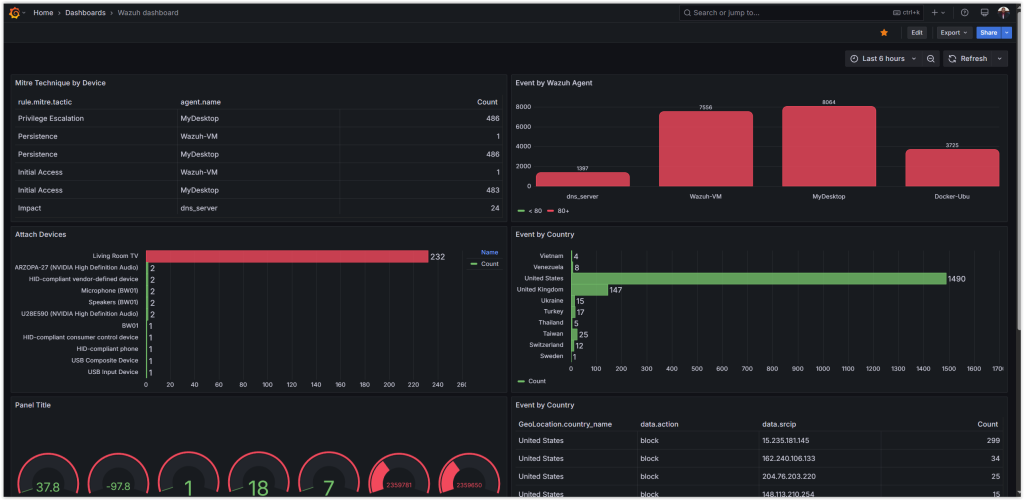
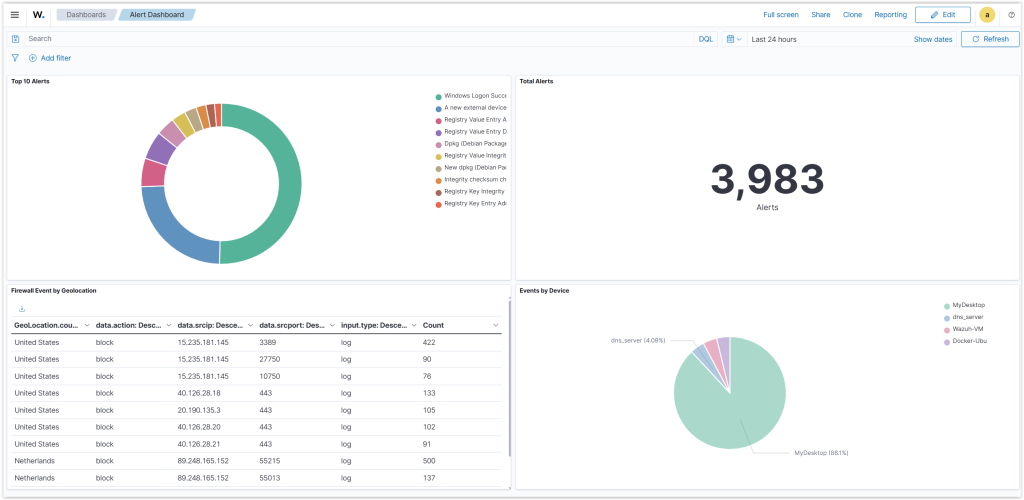
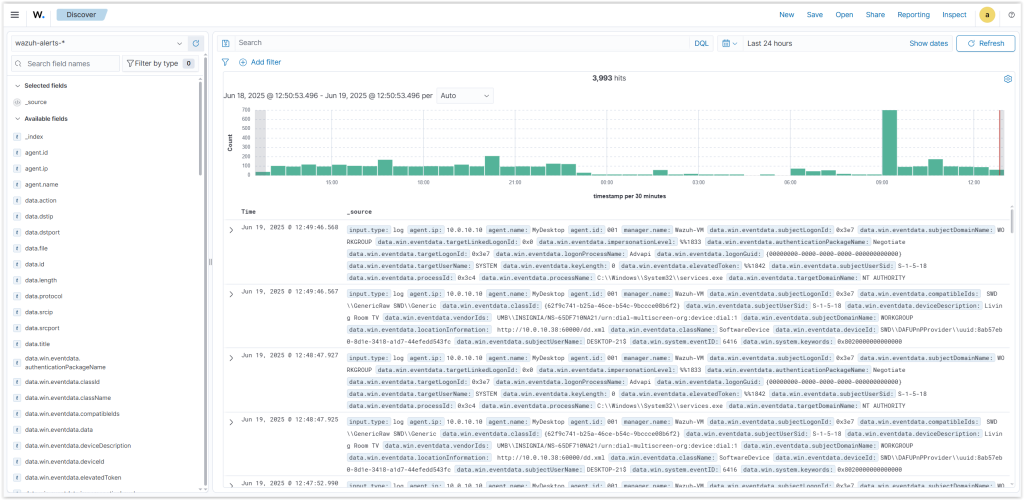
Wazuh Project:
Wazuh is an open-source Security Information and Event Management (SIEM) platform that provides threat detection, log analysis, and real-time security monitoring.
Wazuh SIEM Server (Ubuntu 22.04):
Deployed Wazuh to collect and analyze logs.
Forwarded syslogs from pfSense to Wazuh.
Integrated Grafana to visualize alerts and security trends.
Grafana Dashboard
Wazuh Dashboard
Wazuh SIEM
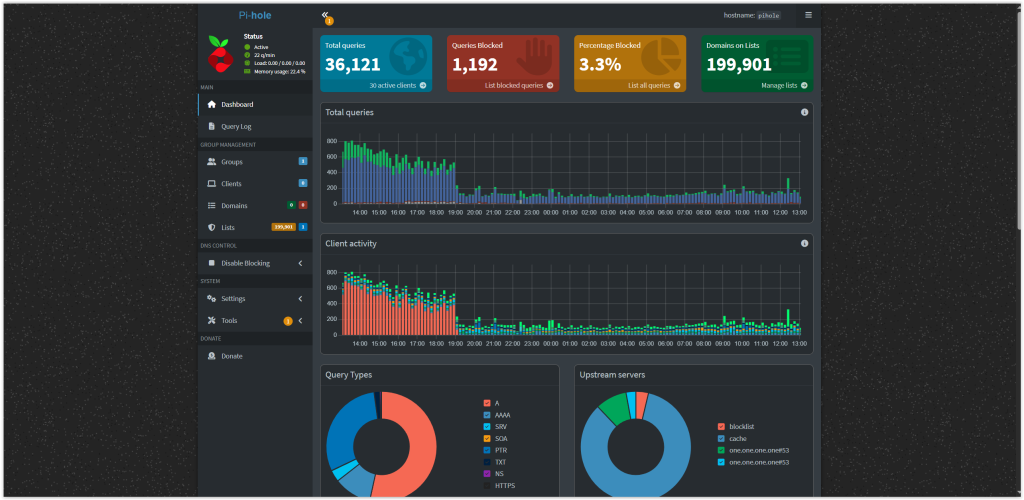
DNS (Pi-Hole) Server Project:
Pi-hole is a lightweight, open-source DNS sinkhole that blocks ads, trackers, and malicious domains across your entire network. It acts as your network’s primary DNS server, filtering unwanted content before it reaches your devices.
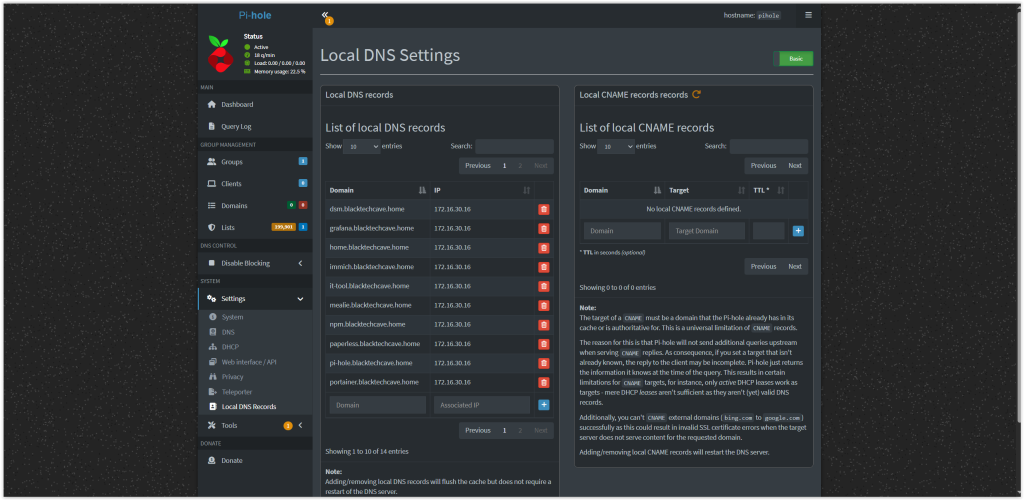
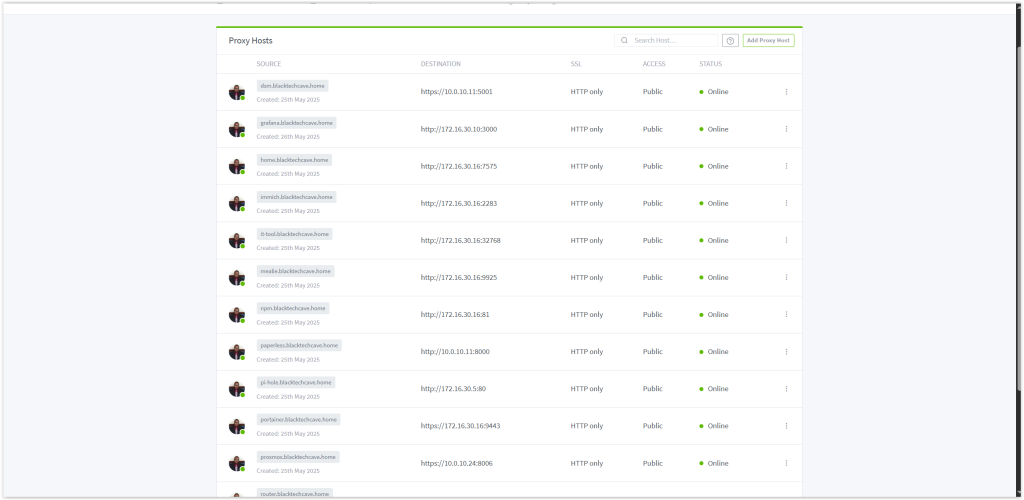
I paired Pi-hole with Nginx Proxy Manager, a web-based reverse proxy tool, to manage and route traffic to my self-hosted services. Together, they allow me to:
Set custom DNS records for internal services (e.g., mealie.blacktechcave.home, immich.blacktechcave.home) using Pi-hole.
Securely route traffic to my Dockerized apps using domain names instead of IP addresses and ports.
Simplify access to services behind my firewall, with Nginx handling SSL and reverse proxy duties.
This setup gives my homelab a clean, internal DNS infrastructure and a more user-friendly way to access my applications.
Pi-Hole Dashboard
Pi-Hole Local DNS
Nginx Proxy Manager
🐧 Linux Transition Project
My latest personal challenge:
Transitioned from Windows and Google Chrome to Linux Ubuntu Desktop as my main operating system.
Currently using Ubuntu 24.04 and Firefox/Brave for daily productivity and development.